
You might only use the Mac’s built-in Preview app when you need to read a PDF or zoom in on a picture, but there’s much more to the software than meets the eye. It’s a pretty handy image editor for Mac, too.
In this how-to, I’ll go over six features that will let you make the most of Preview, a handy tool that’s an overlooked benefit to using a Mac. I have three tips for working with documents and three for editing pictures.
The Preview app is one of macOS’ hidden gems. The image and PDF viewer doubles as a free image editor for Mac users, and can handle many tasks quickly and easily. I explain how to make the most of the Mac’s Preview app in the how-to below, or you can sit back and watch Cult of Mac’s video on the subject:

If you have two or more documents you need to combine, or a page or a picture you want to add to the middle, you can freely combine different files into one document using the Preview app on a Mac. Make sure you have the document thumbnails turned on — click the menu button on the left of the toolbar and click Thumbnails.
Then, you can just drag and drop pages from a different PDF or mix images into the document. Save or close it, and Preview will bundle all the pages together into one file.

This feature is new in macOS Sonoma. When you open a PDF form on your Mac, the Preview app will look for all the text boxes and blank lines and make it easy to fill in. Click the Form button to the right, next to the search button. With the Text tool, you can simply click on a field, type in your info, and hit Tab to jump ahead.
To sign your name on a PDF, you can click the Signature button. Click Create Signature and you will see several options. You can try drawing a signature with your finger on a trackpad or your iPhone, but even as a pretty skilled graphic designer, I have a hard time making this not suck.
Instead, I recommend clicking Camera. Then you can sign your name on a white piece of paper and hold it in front of your Mac’s camera to scan it. This method will best capture your actual signature. Then, when using the Mac’s Preview app, you can drag it on top of a signature line in a PDF and resize it to fit.

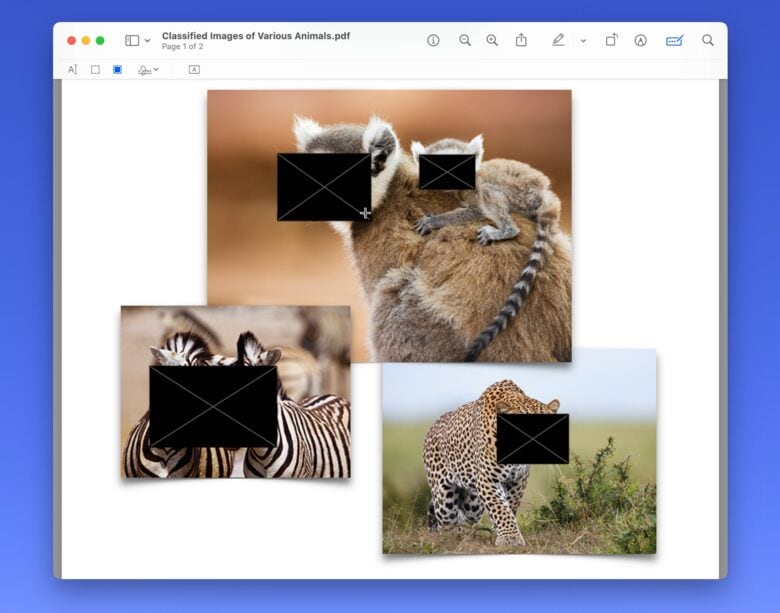
If you need to censor any part of a document, the Mac’s Preview app gives you an easy-to-use tool. Just click the icon that looks like a black box — the Redact tool. This will delete all of the content below, so it can’t be recovered or seen.
Plus, you can click and drag over text to select it and turn it black, or you can click and drag a rectangle over any other spot. You can make edits as long as the document is open in Preview. But as soon as you close it, it’ll be saved and everything below the black will be deleted.
 an image from your Mac's clipboard using the command File >
New from Clipboard" width="1371" height="918" />
Here’s a quick one: If you copy a picture from the web, there’s a quick way to open it in Preview to create an image you can save on your Mac. Just hit File > New from Clipboard (⌘N).

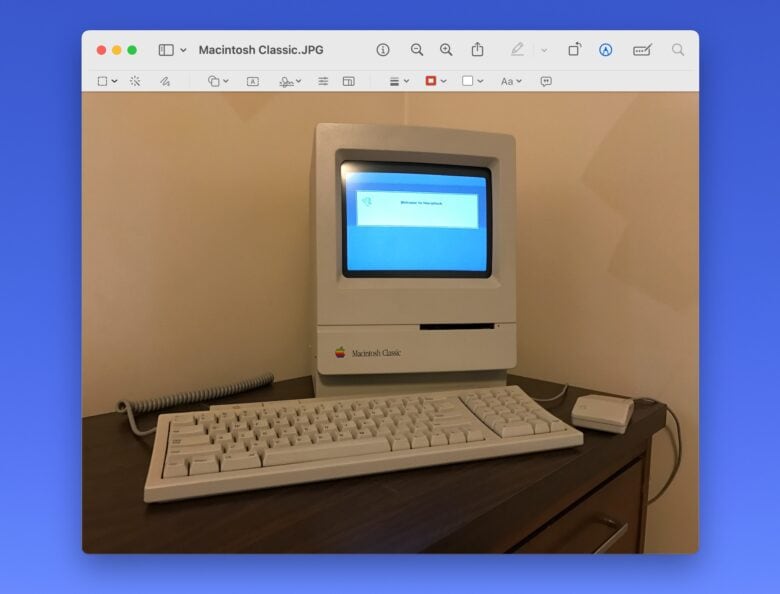
When looking at an image in the Mac’s Preview app, you can click the pen icon to bring up the Markup toolbar. It’s a bit clunky, but the simple image editor also proves pretty useful for accomplishing common tasks.
It offers several tools for editing images, from left to right:

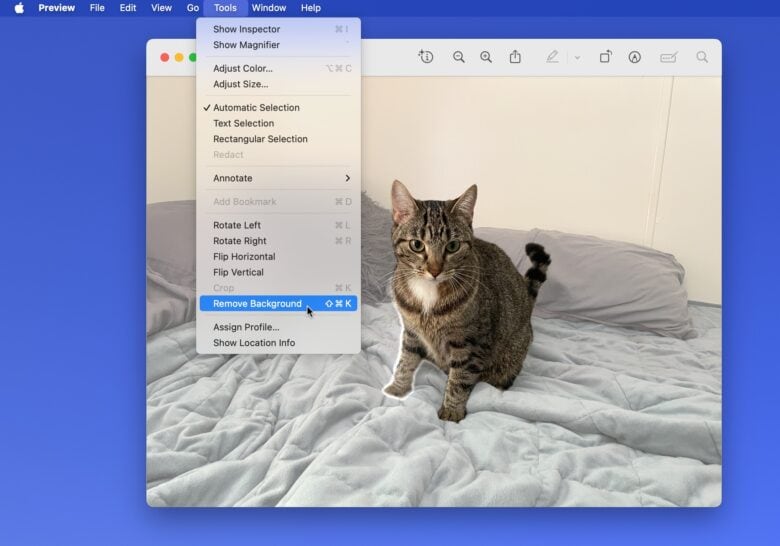
It’s easy to cut or copy the subject out of a photo without the background on an iPhone — but how do you do it on the Mac? The Preview app, of course. And actually, it’s really easy to do with this free Mac image editor.
Just open an image in Preview, then hit Tools > Remove Background (⇧⌘K). It isn’t perfectly precise, as it leaves the edges somewhat blurry and choppy if the images aren’t perfectly crisp and high-resolution. However, it does work almost instantly for those times when you need to quickly remove the background from an image.
Now that you’ve mastered the Mac Preview app, be sure to check out other articles with pro tips for Mac users:
We originally published this post on how to use the Mac Preview app as an image editor and a way to edit PDFs and other documents on October 21, 2023. We updated the content.